
With the 4th of July holiday week upon us, many will be heading out for backyard barbecues, picnics, and sandy beaches for fun in the sun.
Prop yourself up in style with Old Glory with this simple DIY Patriotic Pillow Project.

It’s large, comfy and would be just as great to use while lounging in your backyard as it would be while soaking up the sun on the beach.
Red, white and blue pillows are always in style so wherever you’re headed this holiday week, pack one to go along with your other patriotic-themed gear.
Don’t forget the sunscreen and a favorite read.

The pillow on the cover of this Country Living magazine caught my eye but there were no instructions inside the mag.
No problem. Throughout this post, I’ll show you how I created my own pillow version of Old Glory complete with a triple star twist.

Here’s what you’ll need.
1. Fabric in patriotic colors. (I used ivory canvas, blue denim and red linen).
2. Clear quilter’s ruler. (These rulers help establish, clear consistent marking lines).
3. Fusible applique sheets. (Sold by the yard at all fabric shops).
4. Water soluble marker
5. Pillow form. (I used a 25″ X 25″ form).
Measure the pillowform and add a 1/4″ to that measurement for the seam allowance. Cut fabric for the top of the pillow to match this measurement.
NOTE: I used a slightly more customized technique for the backside of this pillow project. Please refer to my previous pillow making tutorial to see how to make the backside using overlapping back flaps.

If you’ve never used fusible applique sheets (or webbing) before, you’re going to love it after reading this.
The sheets contain paper on one side and a layer of adhesive on the other which is heat activated. When ironing the paper side, the other side deposits adhesive directly onto the your fabric.

Iron a large sheet of fusible web to the wrong side of your RED fabric. The adhesive will adhere to the fabric almost immediately. Always use a dry iron, do not steam this step.
Don’t remove the paper backing until you’re ready to actually attach the red stripe to the new location.
Using a water soluble marker and clear ruler, mark lines 2-inches apart onto the paper.

Use scissors or a rotary cutter to cut the adhesive-backed fabric along the marked lines.
Now, you’ve created your red stripes.
As you can see in the photo below, the right side of the RED fabric is on one side, the adhesive is on the other side and temporarily protected by the paper backing.
Gently peel the paper backing away from the red fabric stripe.
You may not be able to see it clearly in this photo but the entire red strip of fabric is coated with adhesive.
With the adhesive side facing down, I can now iron the strip directly onto my canvas flag form.
(NOTE: This type of fusible adhesive is primarily used for applique type projects to hold small cuts of fabric in place for steadier applique stitching. It’s always worth having a yard or two of fusible sheets in your stash).
Use the soluable marker to mark the 2-inch lines on the canvas to indicate where the stripes will fall on your pillow top.
Remember to measure an open area in the upper left corner for your stars.
After peeling protective paper off the adhesive-backed strips, place them over the marked lines on the canvas and carefully iron in place.

Measure the denim fabric to fit the space for the stars.
Iron the fusible web onto the denim and cut the square which will house the stars.
Peel the protective paper off the square and then iron the denim piece in place.

I raided my scrapbook supplies to find this chipboard card which I used as a template for the stars.
Iron a strip of the fusible web onto a strip of canvas and then trace the stars onto the back of the paper.
Cut the individual stars out, peel off the outer paper, line up the stars on the denim fabric and then iron the stars in place.
NOTE: Because of the size of this pillow I was not able to accommodate the actual number of stars and stripes of the U.S. flag. I realize there are very specific rules for how the U.S. flag should be displayed and/or duplicated. With all due respect, I don’t think this pillow for private, home use is subject to those same restrictions. This project is offered for fun and I hope it does not offend anyone.
The adhesive holds the stars in place so you can easily stitch around the shape.
After stitching the stars in place, stitch the red stripes making sure you don’t stitch too close to the raw edge of the stars or stripes.

Over time, the fabric edges of the stars and stripes will likely fray a bit because technically, the edges are still raw.
I think a little fraying is fine and only adds to the primitive, rustic style of this pillow.

Again, I used an overlapping back flap technique when constructing the back of this pillowcase.
This involves using two large pieces of fabric and overlapping them in the back before attaching both pieces to the top flag piece. I think this technique makes inserting and removing pillowforms a lot easier.
(Check out my previous pillow making tutorial which features this overlapping flap technique).
The technique also provides an opportunity for me to incorporate an embroidered element.

Here’s a look at the back of the pillow featuring the overlapping backflap technique and the embroidered star trio.
NOTE: If you don’t have an embroidery machine, you can always hand embroider an image on the back flap.
Embroidered elements are always a nice, unexpected touch and I think they make the handmade effort that much more special.
I think these stars and the ruby red piping almost steal the show.

So, here’s my grand version of an Old Glory pillow. What do you think?
It’s a super simple project that requires a minimum of supplies (love that) and it shouldn’t take more than an afternoon to complete.

By the way, if you’ve walked into Pottery Barn lately, you may have noticed they also sell an American flag pillow priced at $40 (at the beginning of the season).
As you can see here, you can make your own Old Glory pillow that looks just as good (if not better) and for a fraction of the retail cost.

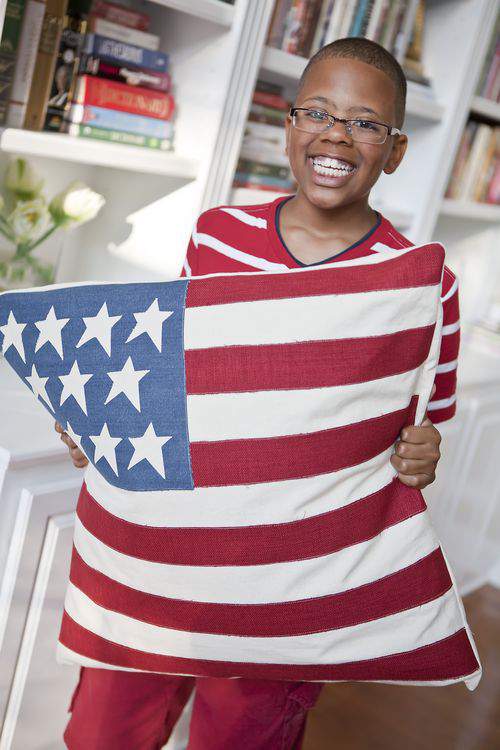
Try making an American flag pillow yourself and see how fast a young patriot in your household claims it as their own.
Considering Jordy’s bedroom colors are shades of red, white and blue, I don’t think I’m getting this pillow back anytime soon.
I’m happy to let him have it.

Meanwhile, have a safe, happy and creative 4th of July holiday.
I’ll see you back here next week for a trip to the farmer’s market. ♥
Wow Lisa that cushion is amazing, I love all the Lexington cushion so this one is just what I like. For something else to add to your backyard be inspired by the pictures of Petersham Nurseries in the U.K. http://www.karenbarclay.com/everything-else/goodbye-winchester-hello-london/
Great pillow and what a smile! If that isn’t a stamp of approval, I don’t know what is! Happy 4th!
Lisa I love the pillows and that you make the flag pillow look so simple. I can not wait to get my sewing machine out and make it. I have got to get me a embroidery machine.
Holy smokes – you make it look so easy but I know my pillow wouldn’t turn out nearly as lovely. Jordy is such a handsome young man.
Beautiful pillow! Again, I love your blog and that you share so many beautiful projects and ideas! Makes me smile!
I love it Lisa! I always think a little touch of embroidery is fun. Love that cute picture of Jordy with HIS pillow LOL. Happy 4th of July!
I love that pillow!! It has a Pottery Barn look, which means your work is fab! And I love the added touch to the back of the pillow. Beautiful! Have a great holiday week!
love it!
Awesome pillow, Lisa. That smile in the last picture makes me smile too. Keep up your beautiful posts in your blog! Happy sewing. Visit and click me for brother sewing machine reviews!
Hi I am trying to get a donation to create a Patriotic Basket for a Veterans Silent Auction. Have Donation Letter and flyer etc. Email amvetscarshow2013@yahho.com. Love the pillows!
simplified at it’s best! love this pillow plus the fusible adhesive will prevent the fabric from fraying too much (as opposed to sewing the pieces on without it.). the embroidery adds the perfect touch.
Hi, I made the pillow, thanks for the clear direction. I’m new to sewing, but I’m happy with it.