
When you have a stack of papers sitting on your desk, sometimes a paper clip just won't do.
In cases like this, consider using a more decorative clip to not only bundle those loose papers, but also add a touch of crafty elegance to your desktop.
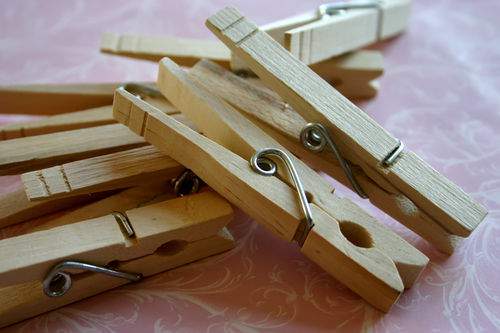
This is another super easy project that requires minimal supplies. Start with plain wooden clothes pins that can be found at just about any craft store.
Clothes pins are super versatile for a variety of cute projects. I'll share some additional fun creations using clothes pins later in an upcoming post.

For this project you'll also need some patterned paper. I used 12 X 12 sheets for this project but any size paper will work because you don't need a very large amount to completely cover the small wooden pins.
You'll also need a fluid overall crafts adhesive, like some Mod Podge or a similar decoupage-like product.

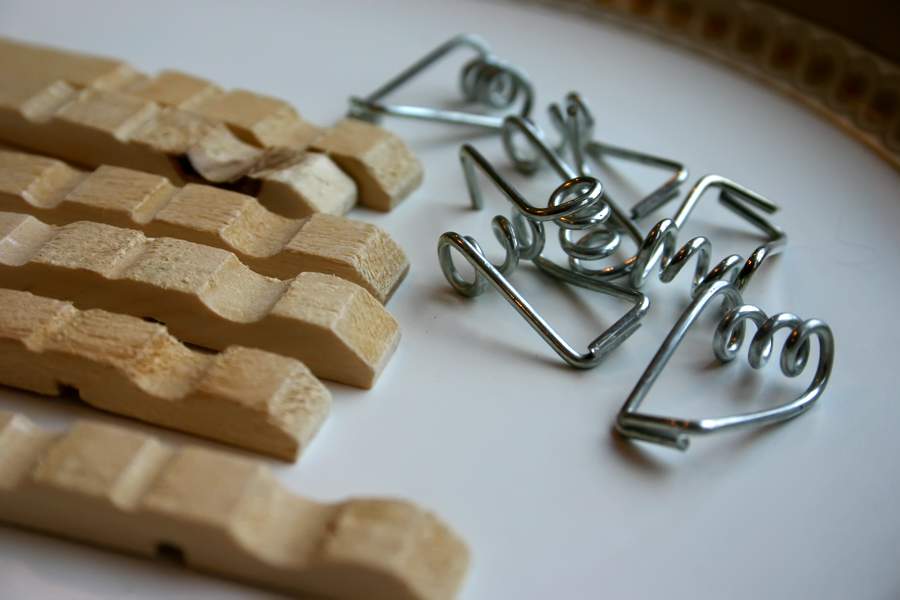
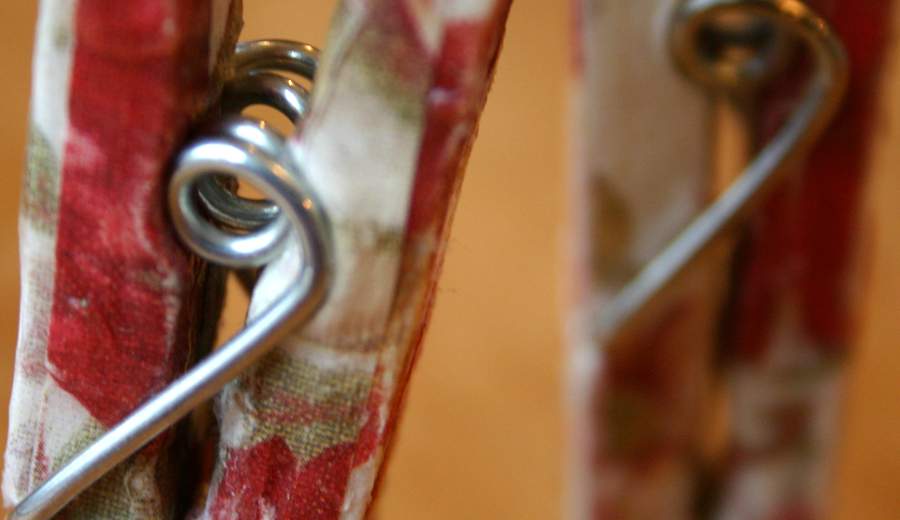
Carefully slide the metal hinge off of the wooden pins. You may need to give the hinge a good tug. Take care during this step because sometimes the hinge can pop off quickly and trust me the sharp ends do not feel good if they stab your finger.
At the same time, try not to bend the hinge out of its original shape as you tug it off the wood.
Cut the patterned paper into small strips to completely cover the front with some overhang to cover the sides. A slight overhang is important to prevent a visible paper seam on the top of the finished clip.

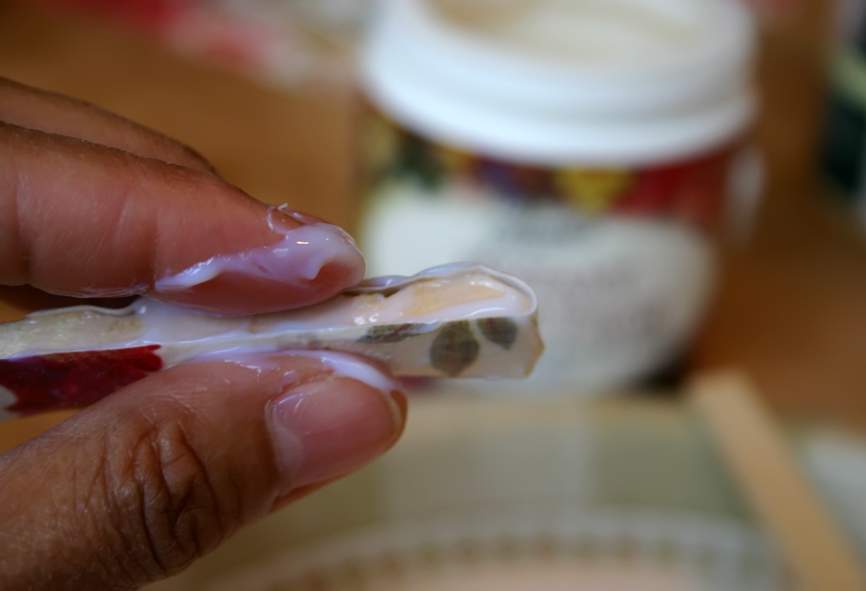
Coat the wooden pin in decoupage material or Modge Podge and then apply the paper strip directly onto the pin. Generously coat all areas of the paper strip as you simultaneously apply it to the wood pin.

I found it easier to simply use my fingers to spread the decoupage material. This way I can feel the various small indentations in the wooden pin. Smooth the patterned paper with your fingers to cover the entire pin.
It is a bit messy but I think it's the best way to ensure all the wood areas are completely and smoothly covered.
Set covered pins aside to dry completely. A paper plate with a elevated edge makes a perfect drying station for this step.

Once the pins are completely dry, carefully reattach the metal hinge. I actually found this to be the most difficult part of this project because that hinge is really tight. You need to pull the hinge apart enough to slide it back on the wood-but not pull it apart so much that you pull it out of the original firm metal shape.
It helps to have an original pin nearby so you can clearly see how the hinge needs to be realigned to fit properly onto the decorated pins and into the proper indentations in the wood.
You can also slightly sand the edges of the finished pins with a craft file to give the project a more distressed, aged appearance if that suits you.

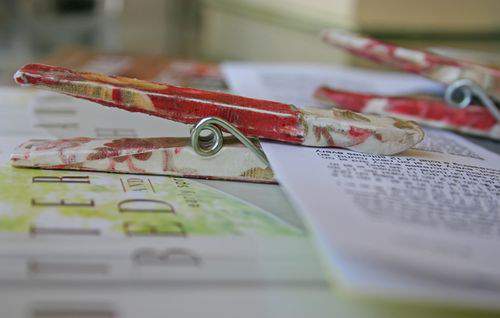
I think these pins are so pretty and they can be used like large decorative paper clips for various papers, important notes or dare I say, those dreaded tax papers. Yes, tax season is not that far off-but pardon me for digressing.

I think a small box of these clips along with some matching stationary would make a lovely gift for that special writer in your life.
If you make a few for yourself, just remember-hang papers, not clothes.

I’m the queen of clothes pins at school. They work absolutely great to hold a big pile of papers that need to be graded. I’ve always just used them in their “natural” version. I LOVE this idea to color them. I’ve never even thought about just painting them either. This would be an absolutelywonderful way just to cover them by using your scraps. I can just imagine a great set of KI clips! So bright and fun! I may just have to bring home some from school and have a clip covering party!
Thanks for the spark of creativity!
You are just TOOOOOOO creative!! How cute!
those are cute. when i saw your messy modge podge fingers i thought of ray raynor and his crafts. do you remember that show. he use to make a mess when he did a project. i loved that show. anyway, another great project. i love the gift idea. thanks for sharing lisa!
Fun post! I can see a magnet on one side to keep track of a few papers on the fridge too – thank you for sharing!
Beautiful and creative!
how gorgeous is that?? you’re my idol Lisa!
My 5-year-old son was thrilled about the “squeeze-pins” as he calls them. “Oh look mum, we can do these squeeze-pins to, can’t we. Pleeease??”
Looks as if crafting runs in the family!
Love this idea, i was actually thinking about doing this and adding them to the pantry to keep the chips fresh, instead of using those ugly plastic “chip clips”!!
Thanks for sharing, now I know I need to do this!
Thanks for sharing this idea! Love the hands on approach to the mod-podge 🙂 Sometimes a brush is more work!
Very cute! They have so many uses!
Awesome, Lisa! And, I have a bunch of clothespins. How’s the craft room coming along. Can’t wait to see the photos.
Very Smart and so cute!!!
I use clothes pins to keep chip bags closed. This would really dress them up – thanks!
This is a fabulous idea, love it! Can’t wait to give it a whirl myself:)
These are just charming! How lovely for a little spur-of-the-moment gift. Handmade makes it personal and touching.
It is so kind of you to take the time to post instructions. Thank you!
don’t forget some magnet strips for your fridge! I save all those magnets from calenders and other advertisements that come in the mail-pizza joints, sport teams schedules, etc. and cut them up for projects like this.
love your tip about sanding the edges-really adds so much!
–kristen
Those are sooo cute…I am going to make some…thanks for the inspiration!
Awesome idea! Thank you!
Great , great and great !!!!Thanks so much for the tuto
You know I love clothes pins. There is just something about them. In fact, I have some sitting in a box. They were just waiting on an idea like this. Thanks!
Hola!! Acabo de descubrir tu Blog. Me encanta!! Soy de Toledo (España).
Gracias por mostrarnos las obras de arte que haces!!
Un saludo!!
P.D: Lo siento, mi inglés es muy malo y prefiero escribirte en español!!
A wonderful work! Congratulations!
love them. So how is your little attic looking??? Can’t wait to see more pics of your studio…Went to your old studio and knew that wasn’t it…LOL. Have a great Valentine to you and yours.
I like very much your blog, I hope you´ll excuse my english.
I don´t understand very much when you explain but your photos are vey good and I can try to do those things.
Thank you very much!!!!
Yor things are wonderfull!
Kisses & thanks!
such a cute idea!! I have been wanting to try something like this and yours is the cutest version I have seen 🙂 I hope you have a fantastic weekend Lisa!! Big hugs!!! xoxo! Britt 🙂
These are so cute!
Who knew clothespins could be stylish? 😉
Adorable. Thanks for the idea!
Super cute and fun-looking project, Lisa! Thanks!
They’re lovely! I’ve been doing something similar, but just on the sides of the clothespins But they look so much better completely covered! I may give it a try this week.
Thanks for all the great ideas you share with us.
Wonderfull work and very creative. I’m going to try to do it.
Goodness gracious, but those are cute! I’m always so inspired by your blog and projects, Lisa.
These are really pretty and I love the papers you used.
Very pretty!
I love your creative ideas Lisa. This one is fantastic. I know I will be making a batch of these.
Hugs,
Kerryanne
Pretty blog and lovely ideas!!!, are a great source of inspiration. I also finish to open my store:
http://a-ma-shop.blogspot.com/, you do not doubt in visiting me to say to me “Hi”. Greetings from Spain.
Núria
Love your blog. It’s beautiful
This is a great idea.
As always, another wonderful creation, Lisa!
I’m off to Michaels, see if they carry modge podge! Thanks for sharing!
Hi Lisa,
I have apron.ology now and saw your lovely pink hostess apron in it! Congratulations to you too. Yours is the first article I’ve read so far and am going to spend the afternoon going through the rest. Oh and thank you for the decorating pegs posting, I still haven’t ventured into the world of paper decor yet and your ideas always get my mind ticking to try.
Take care,
Susannah x
(MALPHI)
THAT is a great idea. I’m going to make some to hold bags shut, like pretzels or chips. Thanks.
Thanks for posting links to all your projects! This one looks great! I’ll have to give it a try!
Congratulations! You have so much useful information, write more.
WOW! I really love this. But I don’t think I can do it with our pin clothes. They are plastic. But I guess I can just buy a wood one.
Impressive blog!
-Arron