
Who doesn't love a good makeover? I love to transform items from an original state to an unexpected and different state altogether.
Whether it's old dresses, picture frames, out-dated ironing boards or (in this case) an old sweater.
It's always fun to create a new look for something old.

For this project the focus is on wonderful and wide linen sleeves.
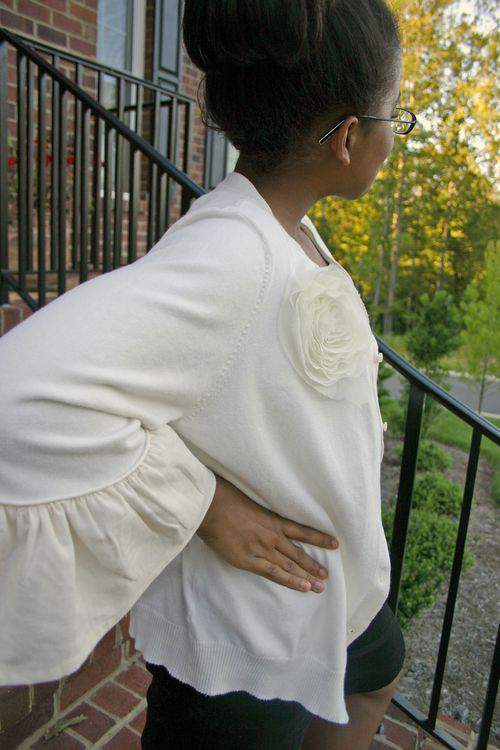
This ivory colored sweater started out with typical, standard-styled arms but look at these arms now.

Before I walk you through this project, allow me to share my inspiration for this effort. If not a fan, most of you are probably at least familiar with the HBO mini series The Tudors.
I latched on to this tv series pretty late, catching only the last two seasons but I was hooked nonetheless. I plan to rent and watch the entire series eventually.
Anyway, I love the story, the lavish costumes, the jewelry and of course, the recurrent wide, wonderful and ruffled sleeves.


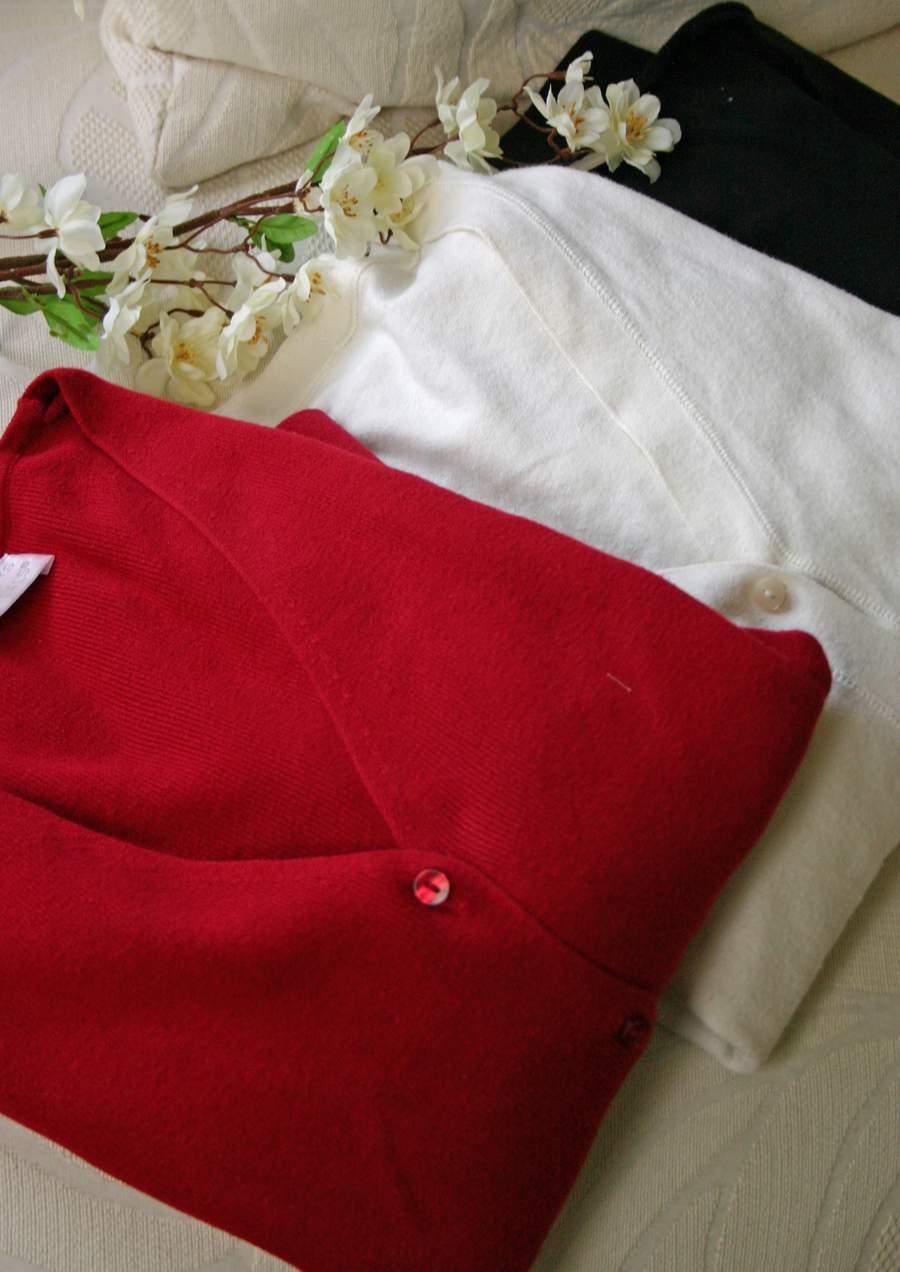
While organizing my clothes closet recently I came across a set of old sweaters, in good shape but rarely used.
Rather than toss them, I transformed them by taking my cue from The Tudors and replacing the bottom portion of the sleeves with a more regal flavor.
This is a very easy project that didn't take much time at all to construct.
First, determine where you want your gathered/piping point to fall near your elbow before cutting the bottom portion of the sleeves from the main arm.
Try the sweater on, mark the cutting position and then observe in a mirror to make sure the cutting line (or where the ruffles begin) is exactly where you want it before you cut the bottom part of the sleeves.
Remember, there's no turning back after you cut the sleeves.

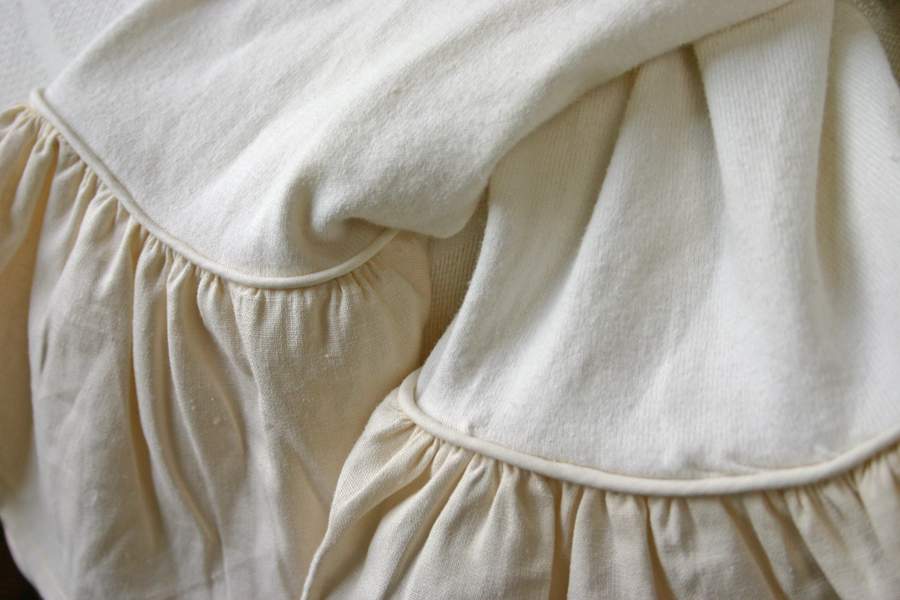
Next step, cut the fabric you'll use for your ruffled ends. You can make these as wide as you prefer. I made my ruffles about 7-inches wide and 16-inches long.
After cutting the fabric, turn over edge about 1/4-inch, press and then turn again. Topstitch. This will be the bottom of the sleeve.

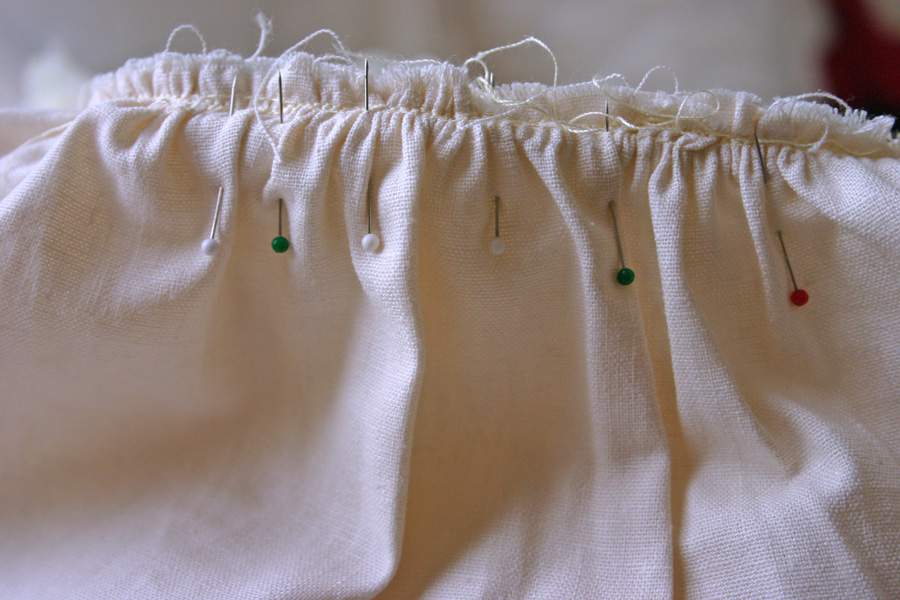
Next step is to add gathering across the top of this cut of fabric.
If you're not familiar with gathers, they're simply wide stitches (basting stitches) across an extended area.
When you stitch two lines of gathers across the edge of fabric, you can gently pull the loose strings on either end which pushes the fabric together to produce a "gathered" effect as you can see in the photo below.

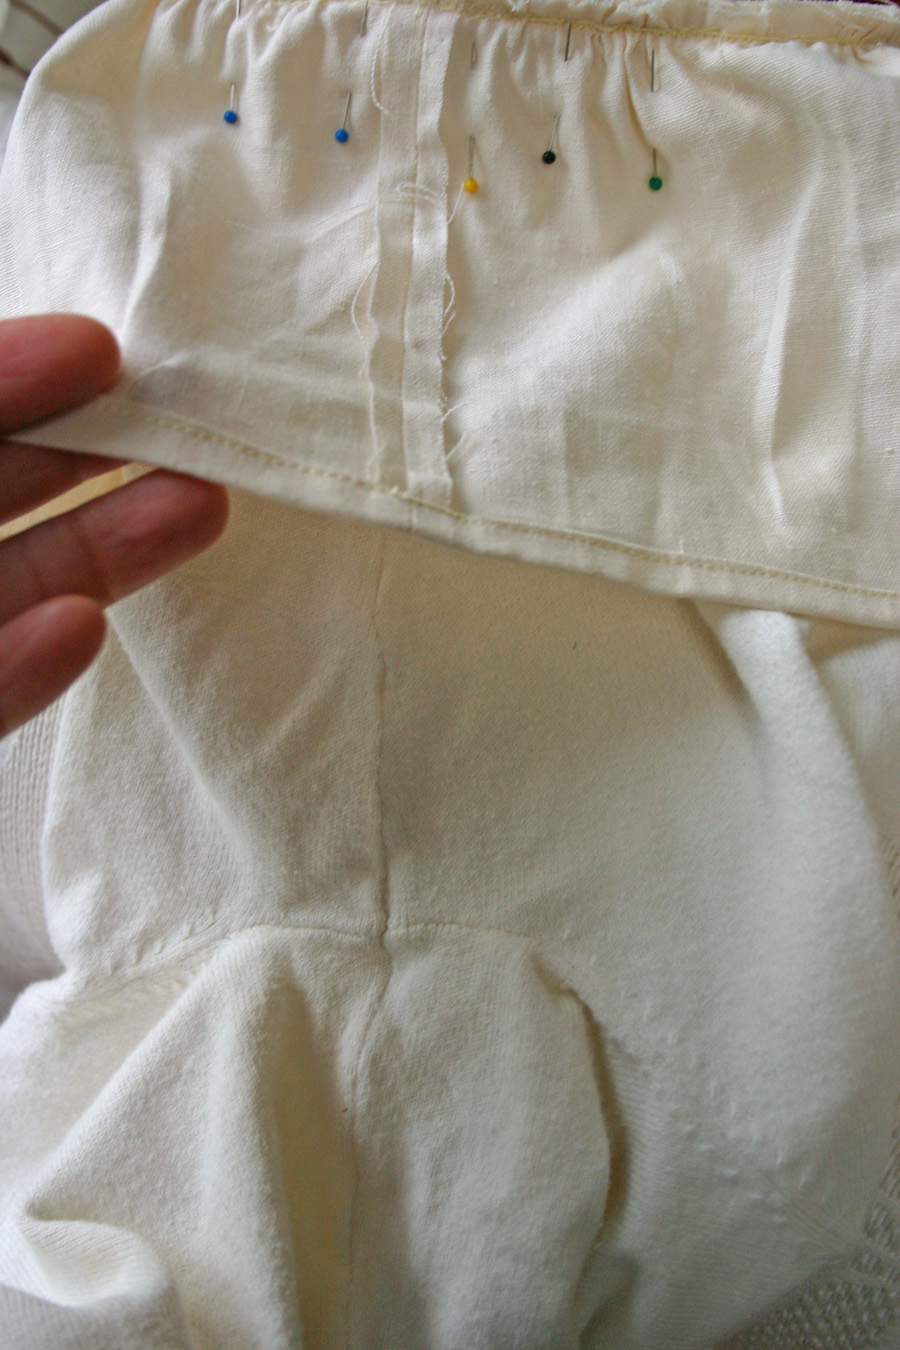
Line up the gathered piece with the open end of the sweater sleeve making sure right sides are together. If you want to add optional trim or piping to the sleeve, sandwich it between the gathered piece and the sweater opening. If you add piping you'll need to stitch all pieces together using a zipper foot for a nice close piping fit.
Adding piping is done the same way you add piping to a pillow. You can see more about how to add piping in a previous post if you click here.
Gently ease the gathered piece so that it expands evenly to fit the sleeve opening. Pin securely in place and stitch.
Make sure you line up the seam from the gathered piece with the side seam on the body of the sweater. It's much neater to have all the seams connected and hidden under the arm.
Piping is a great embellishing element on garments, pillows and a variety of other projects.
You can see in the photo below how the addition of the piping creates a much more polished look to the ruffled sleeves.
This is actually my sweater and I had Cameron model it for me since I didn't have any adult models handy. You'll notice that the gathered/piping point falls well below Cameron's elbow in this photo.
I think this ruffled effect looks better if the piping point is a bit higher on the arm which is how it fits me.
It all boils down to personal preference but just make sure you take "positioning" into consideration.

I love this ruffled look. It really softens the sweater and I think it turns a fair sweater into a fantastic one.
Here are few more pretty views.

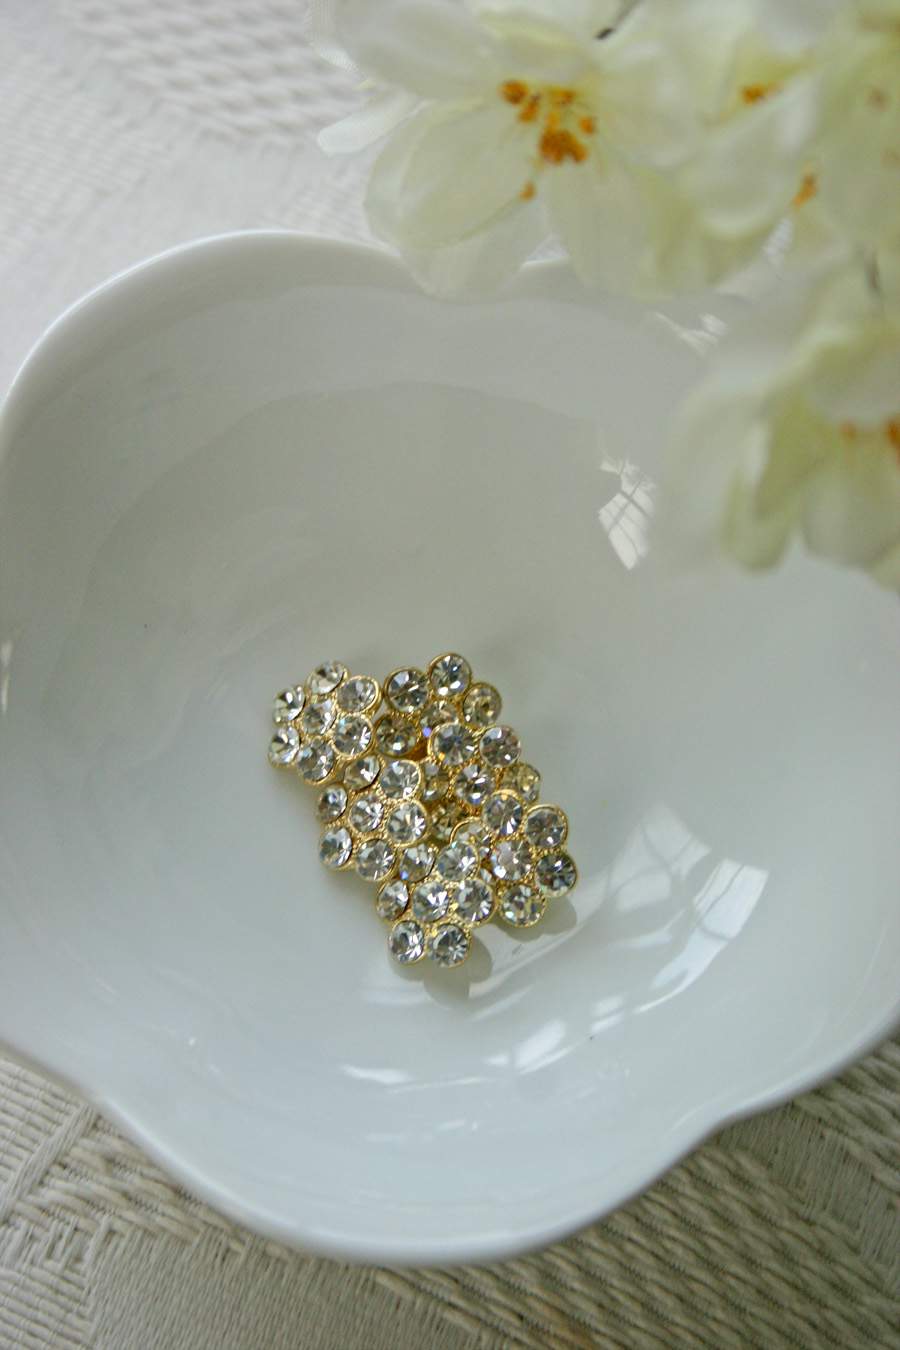
Another way to make this makeover project pop is by changing the plain buttons. The original buttons are fine but this is one thing that can easily be changed to contribute to the overall makeover.

Consider something like these small flower-shaped rhinestone buttons which would look great on this sweater project.
I went back and forth on whether to add machine embroidery to the side of the sweater or go for something more loose fitting.
I opted for loose fitting with this pretty organza wrapped flower. These easy-to-make flowers are great for a variety of projects including garment adornment, pillows, etc.
You can also find pre-made flowers like this at many crafts and fabric stores.

Out-stretched arms give you another great view of the poofiness of these sleeves.

Meanwhile, special thanks to my sweet model Cameron.
Obviously, this is one sweater transformation that gets a two thumbs up.

Now that I think about it, my pre-teen may like this makeover a little too much.
By the look of things, I may have a bit of trouble getting my roaring ruffles back anytime soon. ♥

I do not have a sewing maching — will you take orders??? That makeover sweater is fabulous. Humm, I might open a few “give stuff away” boxes to see if there is some “makeover” potential. Thanks for the creative nudge once again
Gorgeous! I will have to try this! Your kids are always so cute in your posts! Suzie
Hi Lisa,
I love this idea! I am going to try this this one of my sweaters… by the way I watch the Tudors too!
You are always so creative..I still love your quilts very much.
Have a sweet day, Elizabeth
Ruffles are so in style now. I’m usually not a style follower, but I am loving the ruffles and puffy flower’s. I do have some ‘remake’ projects on my list of to do’s, as in T-shirts and sweaters. I love what you’ve done with this sweater. Cute model too:)
Cameron and Jordy are the cutest!
Lisa, your children are just so cute! I love to see their smiling faces.
I had to stop and comment Lisa… such a cute upcycle!
Now that is just too cute for words!!!
Excellent Idea!
Oh wow! That is just so pretty! I will have to rethink some of my own clothes. Thanks for the inspiration. Your model is adorable too.
That sweater is gorgeous! Your DD looks lovely in it.
Beautiful!
I have a few sweaters I want to dress up a bit. Thanks for showing how to do the ruffles. I love the romantic look!
Beautiful results Lisa- it is so satisfying to embellish a plain sweater like this- she looks so beautiful in it too- love the flower too
Great redo of a practical piece of wardrobe. I love the sleeves and how you enhanced them. Happy wearing…
love the sweater makeover (also a fan of the tudors) and I think your right, your going to have to make another one either for yourself or your daughter.
Hi Lisa,
I love this project and the piping makes such a lovely finish. A really beautiful way to customise a cardigan and bring it new life.
Best regards,
Susannah Dashwood
Leeeeesah…This sweater re-do is Soooo ADORABLE!! I have to try this and when my teenage girls wonder if I bought it at Macy’s and find out it’s a re-worked item, well they’ll just go nuts! hee hee Thanks for sharing. And as always your daughter is the perfect model!!
Beautiful Sweater, great remake!