
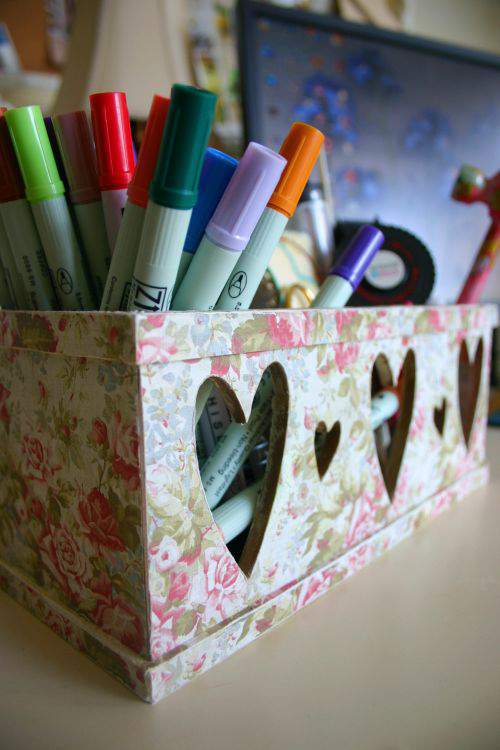
On just about any desk you’ll likely find an assortment of loose supplies just waiting for a little bit of organization.
This project will not only get those loose scattered pens and pencils in one place, but at the same time create some pretty style as well.
I love great storage solutions and I’m always on the lookout for ways to dress up my workspace. This is another low-labor project that will only take you a few hours to complete.
Trust me, your tools and supplies may actually get a lot more use when they’re displayed in something attractive like this.
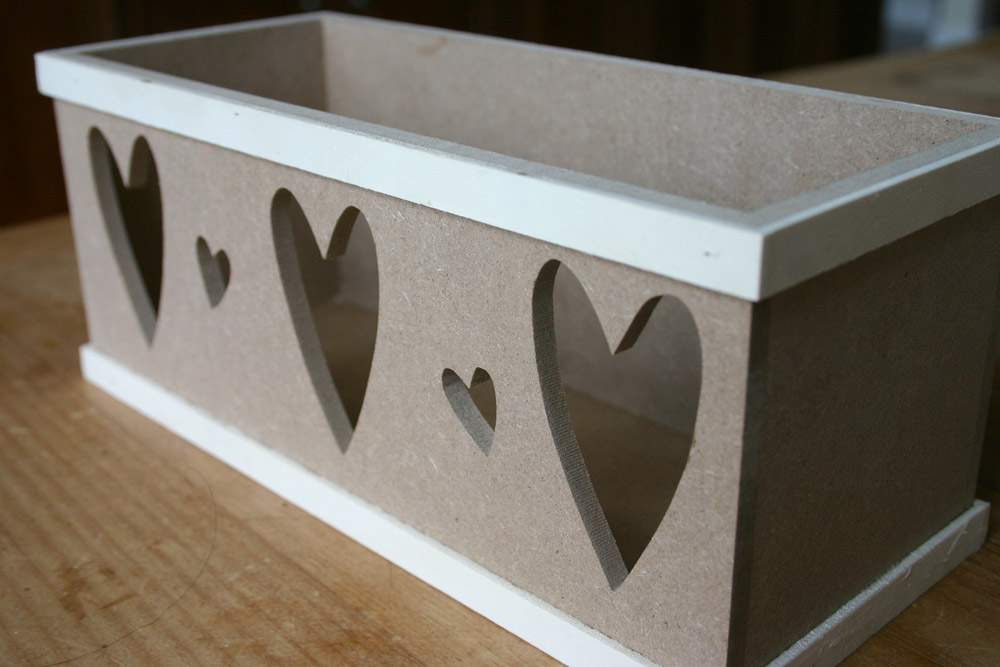
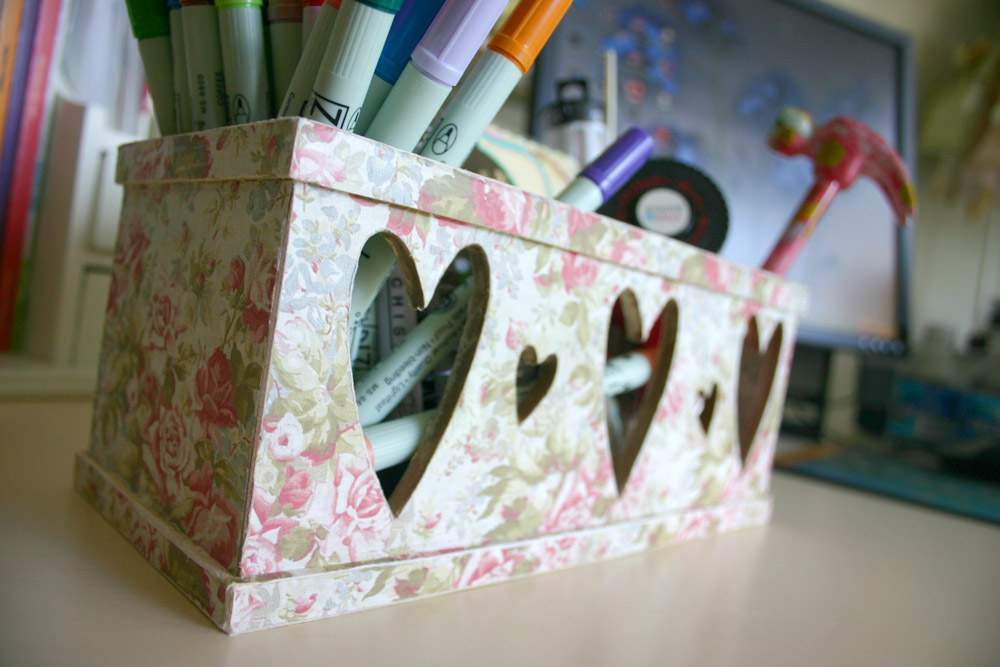
Start with a simple wooden box like the one in the photo below. These boxes are available in a variety of styles at most local crafts/hobby shoppes.
You could paint the trim a desired color and only wallpaper select areas of the box. However, I decided to wallpaper the entire box and raised trim for a more consistent, old-fashioned appearance.
I settled on this soft, floral patterned paper because I wanted the box to look like a vintage find.
Consider who’ll be using the box when selecting the paper. For example, if the storage box is for a child, a bright polka-dot pattern or other fun design will make a totally different statement.
After making a patterned paper selection, measure the width of the box to determine what size paper strips you’ll need.
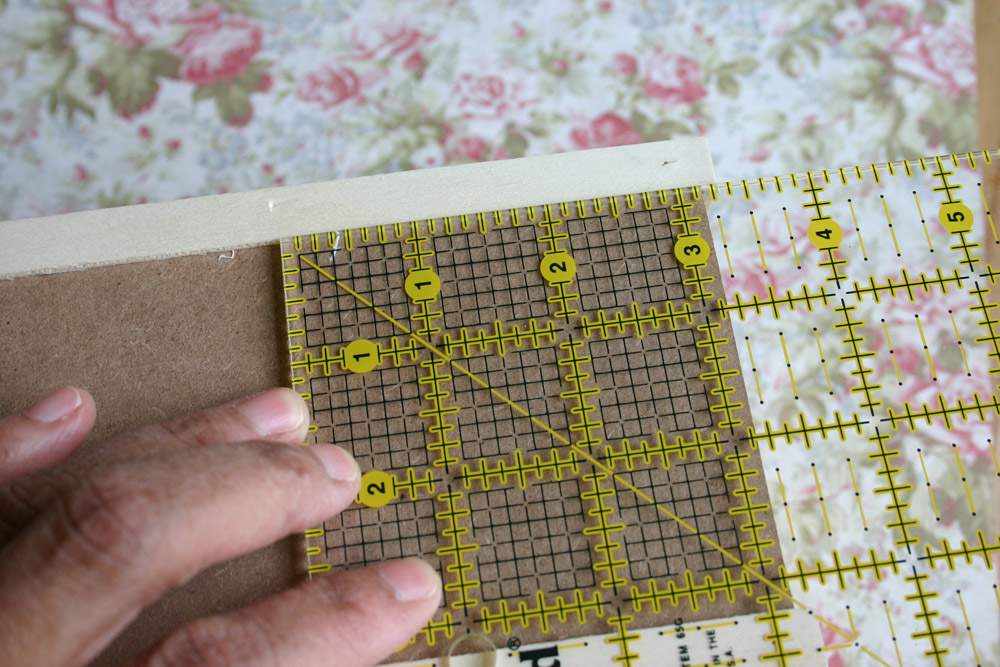
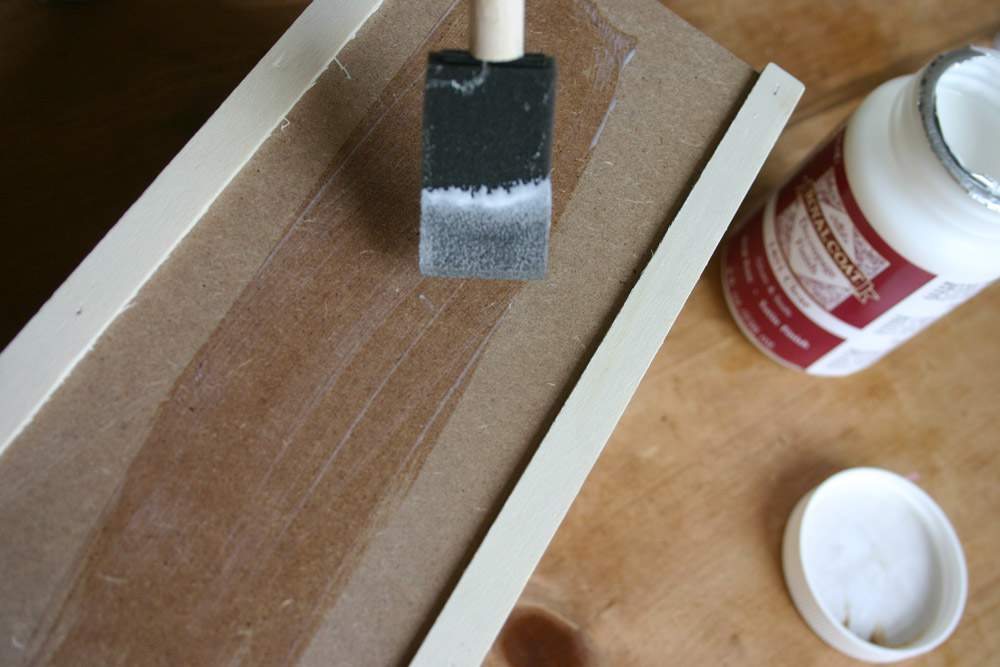
Apply a decoupage medium or similar glue product to the box on the bottom and sides respectively.
Only glue one side at a time and then add the paper as you go.
Attach the pre-cut patterned paper strips to the wooden sides. If your box has a raised trim as this one does, I think it’s easier to attach the paper to the larger areas first and then cut smaller strips to cover the trim.

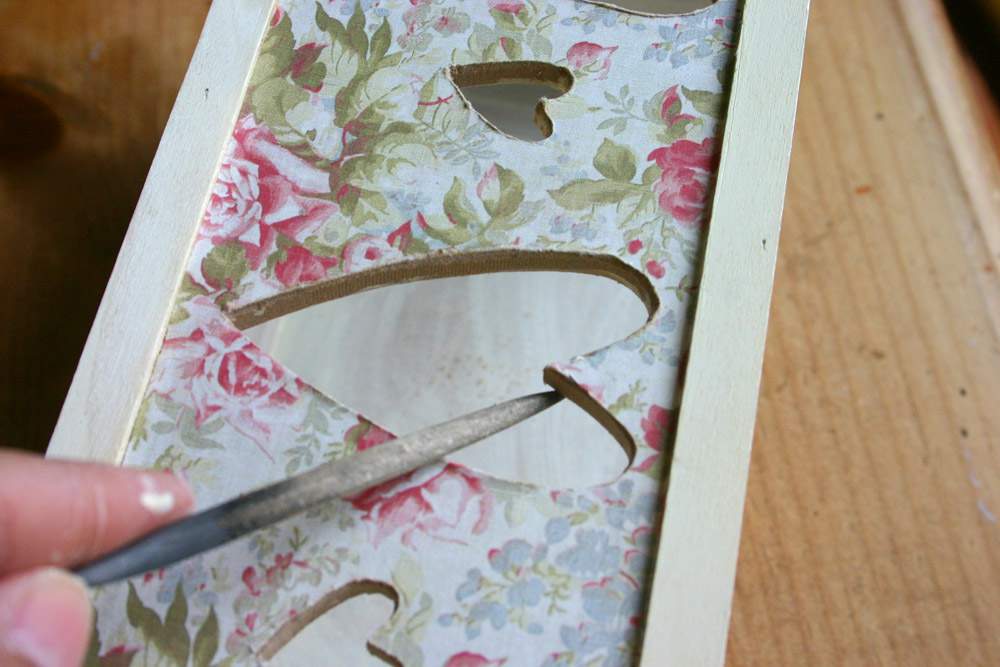
Because this particular box has heart-shapes, there’s an extra step to reveal these decorative openings.
Cover the hearts completely with the patterned paper and then use a thin craft (or nail) file to carefully etch away the paper from the shaped hole.
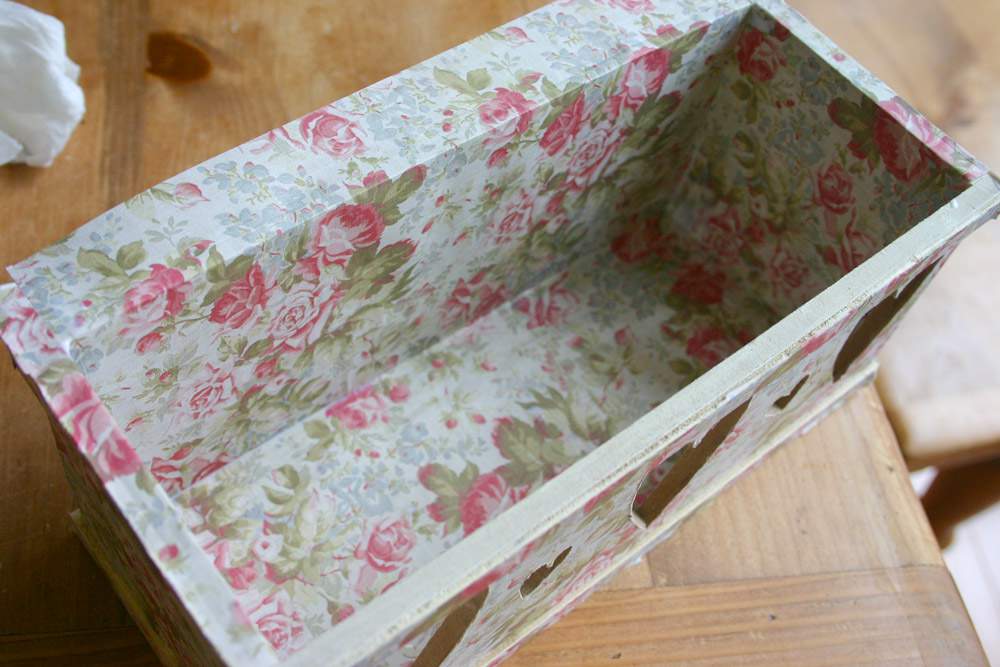
Once you finish exposing the heart shapes, add another application of glue to the inside the box. Allow the paper to wrap over the top for a more seamless finish. Then apply the smaller pre-cut strips of matching paper to the front trim.
Use the craft file to distress the corners and edges of the box to give it a more aged appearance.
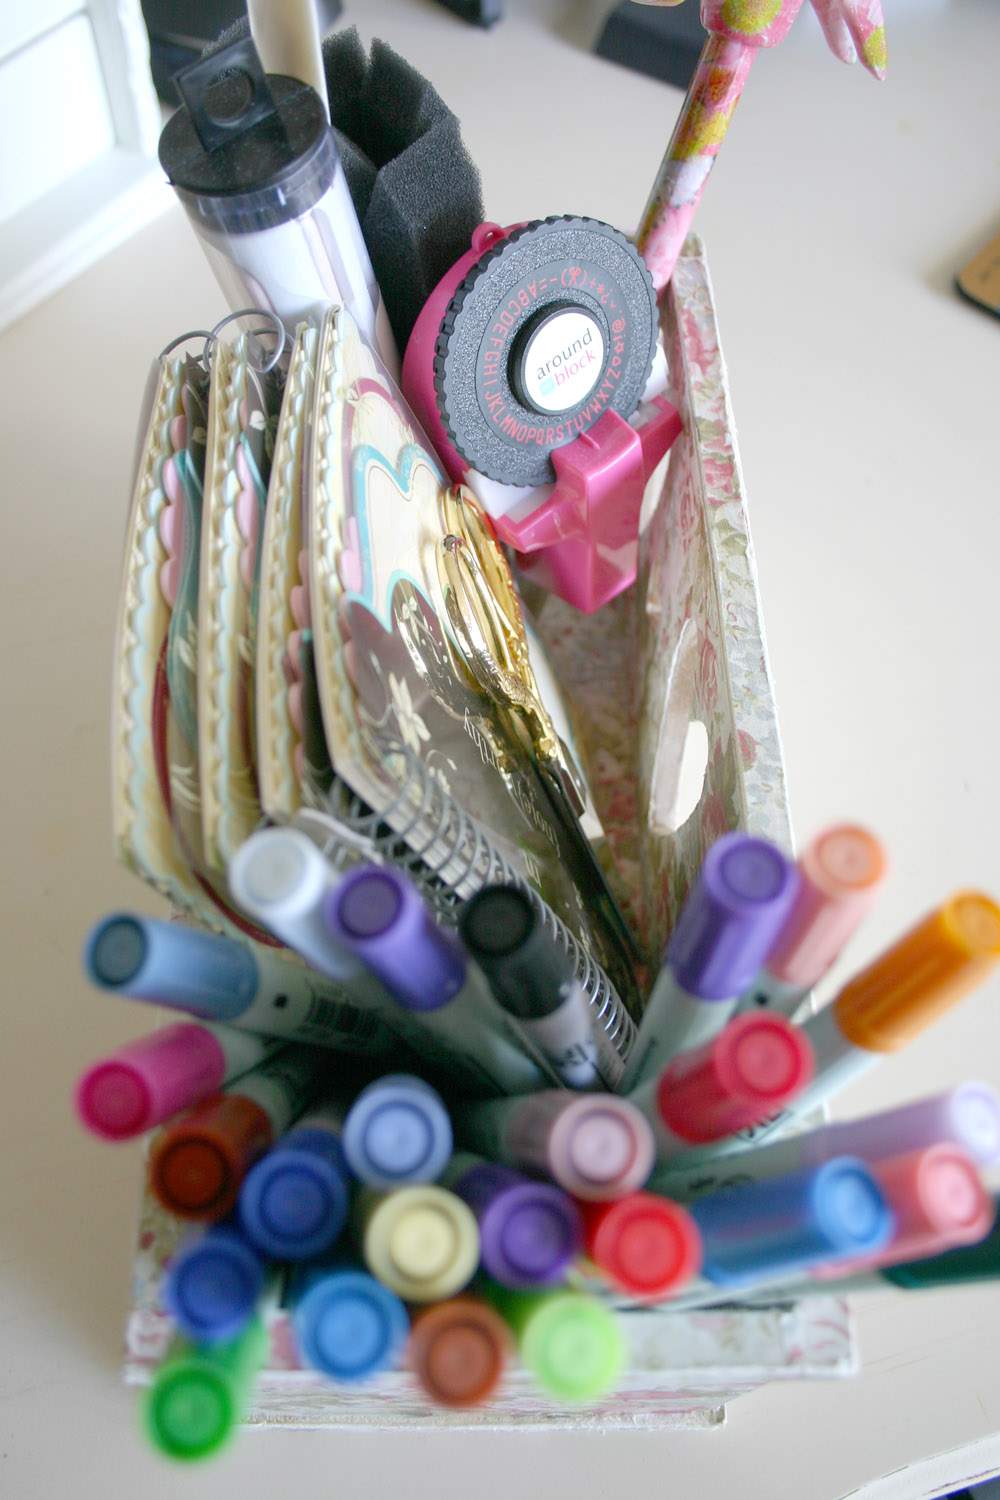
It’s also easy enough to create matching desk items to go along with the storage container.
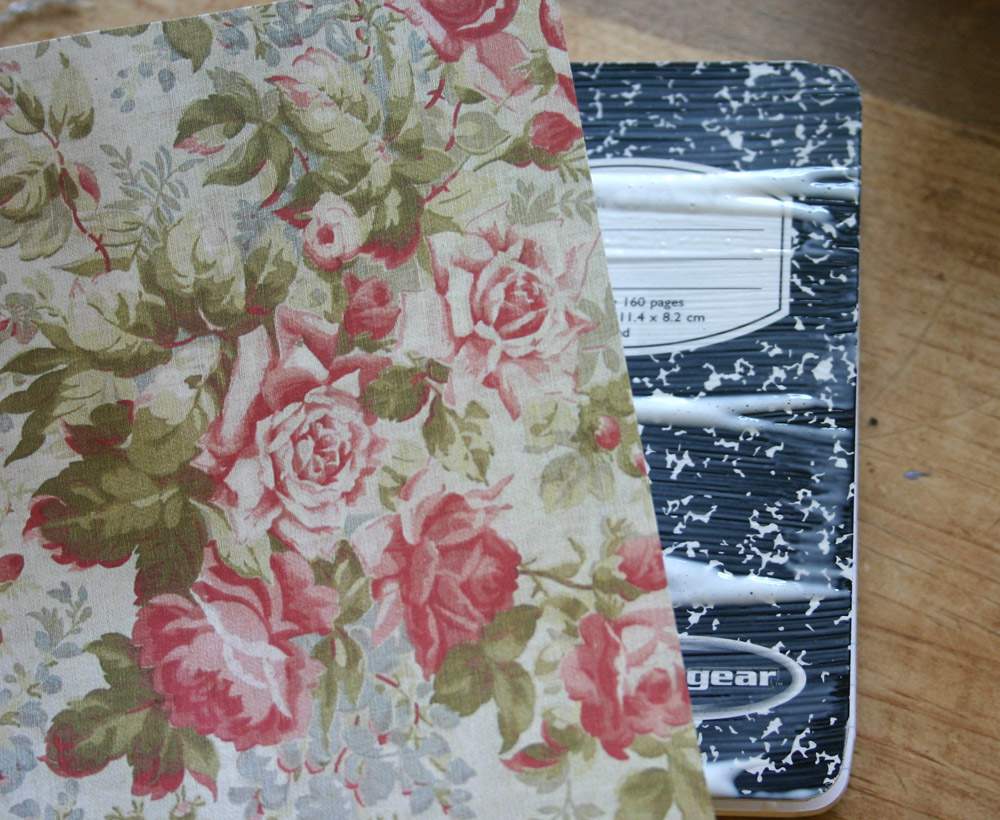
These mini composition books (3 1/2″ X 4 1/2″) are ideal for keeping daily notes and creative ideas. They also a perfect desk-to-purse size.
To cover the mini book, apply the same glue to the front (and back) and then adhere the patterned paper.

After trimming excess paper from the sides, use book binding tape to cover the spine as you can see in the photo below. You can also slightly edge the sides with rubber stamp ink for a nice effect.
Apply the same technique to the larger, school-size composition books to give that traditional black and white marble design a much fresher, personalized look.

Decorative clips are another way to add to the desk ensemble.
These are made of simple wooden clothes pins and patterned paper. You may recall an earlier post on this blog on how to make these fun clips.
You can read that tutorial if you click here.

These clips can be used for a lot more than keeping those loose papers organized. You can also use them to clip bags of chips and other goodies in the pantry.
Also, adhere a small magnetic strip to the back of these clips and they’re transformed into a pretty refrigerator display-holders for all those wonderful school art projects.

As we head into the fall season, this is the time that many crafters start thinking of what handmade gifts they’ll be making for the holiday season.
I think any gift recipient would love a collection like this.
Whether you make a desk set like this as a gift or make a set for yourself, this is one project you’ll definitely enjoy creating.
When it comes to handmade decorative desk decor, it’s fun, fast, feminine and functional. Now, you can’t beat that.
This is lovely – what a fabulous idea! I decoupaged an entire filing cabinet one time, but I never tried the smaller stuff. I love those notebooks. I wouldn’t be embarrassed to carry around one of those, lol!
Well done, fabulous creative projects, nothing like being organised and pretty all at the same time. Thanks for sharing the ideas with us all.
You always make the greatest projects!
That’s so pretty Lisa. You always have the most lovely storage solutions ideas. I have some paper I’ve been meaning to use on some storage solutions. I think I will get to working on them soon.
It works great with magazine file holders also. I use the cardboard ones from Ikea that are $3 for a 5/pk. I affixed labels on them after I finished papering them, and use them to store sewing patterns.
Wow Lisa! Those are some beautiful accessories! I love the print you’ve chosen — thanks for sharing with us!
Very cute projects! I love pretty storage ideas. I’ve done those clothes pins before and they’re addicting! Also the composition books – you can go so crazy embellishing those!
Manuela
Aren’t those pretty?!! What great gift ideas too. Love it!
I use the mini composition notebooks all the time. I like to keep one in my purse for notes, lists, etc. The box is wonderful – definitely a beautiful way to display supplies.
Karla
I just love your blog! I am mainly a scrapper due to time constraints but have started trying out all sorts of other things now in a smaller way thanks to exposure to blogs like yours that give me the confidence to “just do it!” Thank you ;-D
Very pretty! TFS!
Thanks so much for this tutorial. I have always wondered how people cover composition books. I was just in my favorite paper shop the other day and noticed that they carried bookbinding tape. Thanks again.
Karen
Hi I’m Alessandra from Italy.
I discovered your blog today and I love it!!!
I see ALL your posts. GREAT!
There’s ‘something poetic and hypnotic in your blog, I’m really glad!!!!
Kisses e ciao bella!
What great ideas for organizing & storing stuff!! SO glad I decided to sit & catch up on favorite blogs tonight! 🙂 chris
lisa, sorry i have been missing. i have missed you. cute project. i love organization. i strive to be organized but i am not always successful. with cute tools like that how can i not be. love the little notebooks.
I am always looking for more storage solutions. My desk could use this! I think this should be my next project. Thanks for sharing
I just found some wonderful green and white wrapping paper for Christmas… It may not get used for Christmas now:)
Really pretty. I love beauty AND function together! Thanks, Lisa
Lisa … I truly love this creative idea… and what special gifts they would make…
Just think how you could make something like this for your bedroom to coordinate with your decor …. and how lovely it would be to have it sitting on your nightstand to jot down notes and ideas that come to mind …. happens to me a lot when I cant sleep…
Thank you for another fabulous project..
JO
Hi Lisa, I just commented on a blog following a comment of yours…so thought I would pop over and see what you have been creating. Wonderful projects over here that are so well thought out!
Awesome! I’ve been wanting to alter my composition notebook for the last few years and never got around to it, but when I saw yours, I knew I had to do something!! Thank you for the inspire!
Oh wow! You made this all yourself? I love your floral clips. They look very stylish and girly. I love it.
This is a wonderful project for my daughter. She loves to DIY almost everything. Thanks for the step by step tutorials on this beautiful projects.
Lisa, those clips are gorgeous! Love the idea and I will make some time to take a peek at the tutorial. They would make a lovely gift, thanks for sharing, Amanda.
I loved the type ad commenting system very clean and very efficient.
Love to read more from you on the topic above
I really like what you did especially to those clips.. 🙂 great work as usual.. 🙂
Such a great speech, thanks for bringing it to my attention!*
Aren’t those pretty?!! What great gift ideas too. Love it!
Lo que las grandes ideas para organizar y guardar cosas! Nos alegramos mucho que decidió sentarse y ponerse al día en los blogs favoritos de esta noche!
You always have the most lovely storage solutions ideas. I have some paper I’ve been meaning to use on some storage solutions. I think I will get to working on them soon.